When you set up a Sitebulb audit, you are able to customise with a high degree of granularity the data that Sitebulb collects when auditing websites.
There are lots of options in the audit setup, which basically break down into these three 'zones'.
On this page, we will run through the 'Audit Data' options, which are marked in red as 'Main Data Options' in the image below.
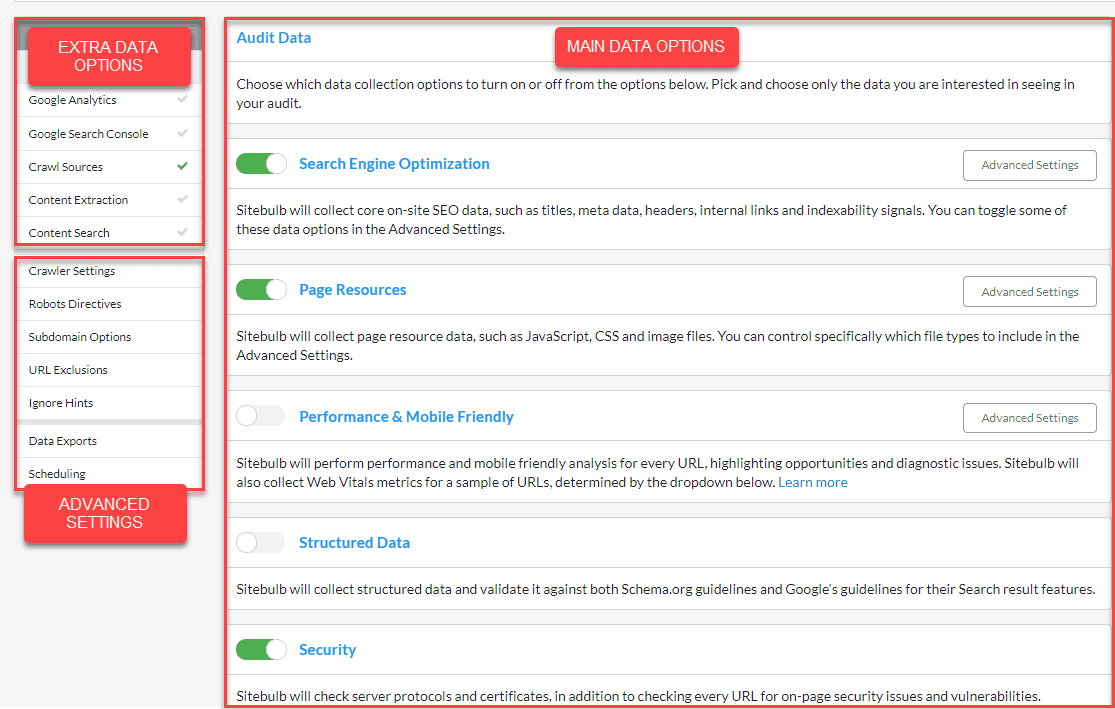
By default, certain options are ticked, so if you just go ahead and start your audit without adjusting anything, Sitebulb will crawl your website and collect data regarding SEO, Page Resources and Security.
Sitebulb will collect core on-site SEO data, such as internal links and indexability signals.
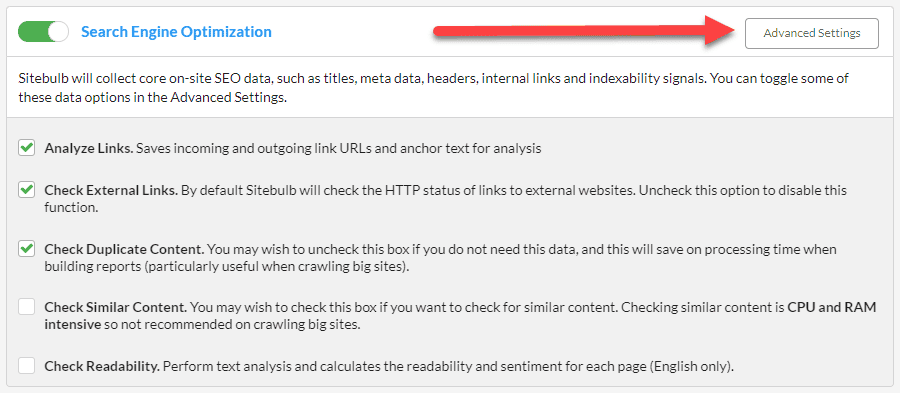
Check Similar Content is now switched off by default because it is CPU and RAM intensive.
You can toggle some of the data options in the Advanced Settings, which you may wish to do in order to save time and CPU resources:
Just below this you will see an optional section called 'HTML Area Settings'. This is optional because Sitebulb is already really good at automatically detecting these different on-page content areas, and correctly assigning internal links into their various buckets. However, certain websites may have a particular HTML structure that makes it difficult for Sitebulb to detect.
As such, you may find that Sitebulb cannot always perfectly identify the right areas, and may misclassify link locations or inaccurately define the content area. If this does happen, you can manually over-ride Sitebulb's automatic detection for any of the locations via these configuration boxes:
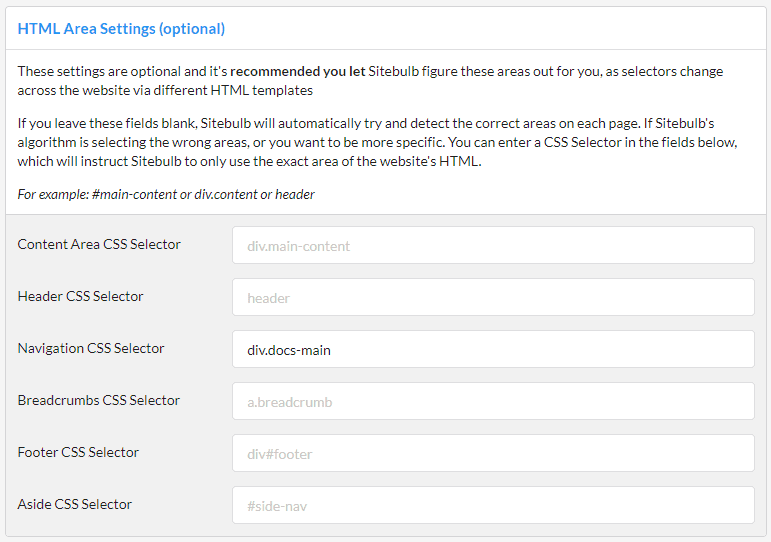
Simply add in CSS Selectors to classify any areas that Sitebulb is getting wrong.
NOTE #1: You can only add in 1 selector for each area. So if you have a site with tons of different HTML templates that all use different divs for what is essentially the same thing, Sitebulb will not be able to save you, and you'll have to go begging to the devs to sort it out.
NOTE #2: This is entirely optional. And in most cases, entirely unnecessary. Just trust Sitebulb completely, it'll be fine...
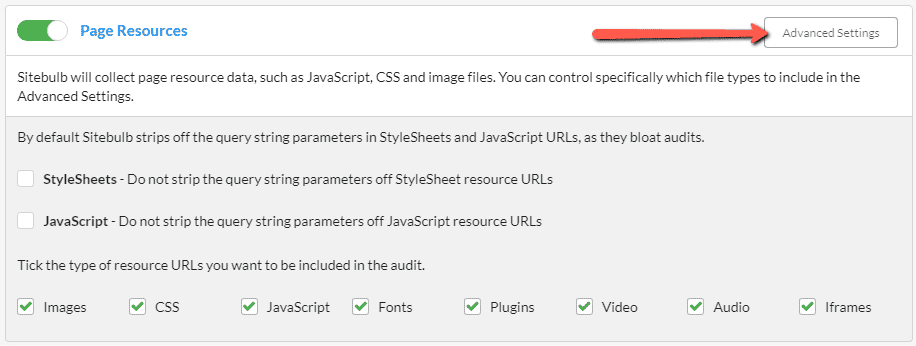
In addition to crawling and reporting on data for HTML URLs, Sitebulb will also crawl and check page resources, such as JavaScript, CSS, images, videos and audio files.
You can click to select which data options you wish to include/exclude in the audit via the Advanced Settings.
Sitebulb carries out its performance analysis directly with headless Chrome, which means the Chrome Crawler is required. If you have the HTML Crawler selected, you will see this message below. You can switch to the Chrome Crawler in the Crawler Settings.

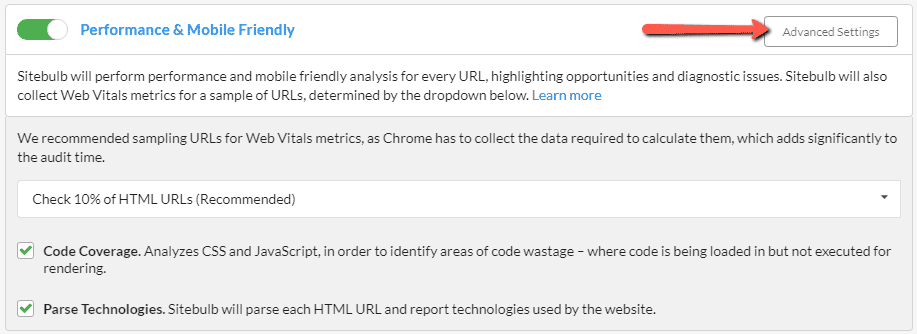
With Performance & Mobile Friendly enabled, Sitebulb will perform performance and mobile friendly analysis for every URL, highlighting opportunities and diagnostic issues. Sitebulb will also collect Web Vitals metrics for a sample of URLs.
Enabling this option will automatically open up the Advanced Settings, which allow you to change the sampling for Web Vitals (default selection 10%) and toggle the Code Coverage and Technology options.
We have a complete guide on auditing performance and Web Vitals.
Sitebulb will collect structured data and validate it against both Schema.org guidelines and Google's guidelines for their Search result features.
We also have a comprehensive guides on auditing Structured Data.
Sitebulb will perform server analysis on protocols and certificates, in addition to checking every URL for on-page security issues and vulnerabilities.
Sitebulb will crawl URLs specified in hreflang annotations (even if they are on different domains), and check the validity of hreflang and HTML lang attributes.
Check out our guide on how to audit Hreflang & HTML lang in Sitebulb
Sitebulb will check the spelling on each internal and subdomain URL.
Enabling this option will open up the Advanced Settings which will allow you to change the dictionary type and even set up a custom dictionary.
You can also check the Automatically Select Dictionary option if you want Sitebulb to use the HTML Lang attribute to determine which dictionary to use.
We also have a complete guide on how to spell check a whole website.

Sitebulb will crawl any AMP URLs found, and check that they are valid and reciprocal.
You can use Advanced Settings to toggle crawling pure AMP URLs (on sites that only use AMP pages).

Sitebulb carries out its accessibility analysis directly with headless Chrome, which means the Chrome Crawler is required. If you have the HTML Crawler selected, you will see this message below. You can switch to the Chrome Crawler in the Crawler Settings.
In Accessibility Advanced Settings, you can select the accessibility standard you want Sitebulb to check against, as well as extra accessibility options for a more granular report.
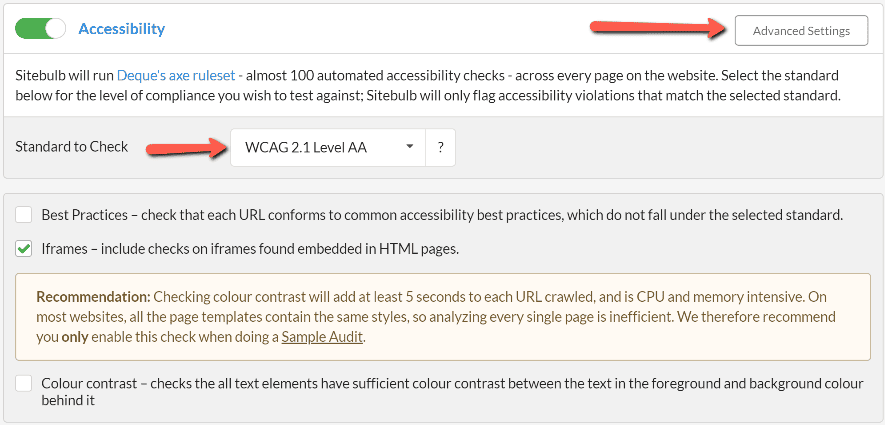
With Accessibility enabled, Sitebulb will run over 50 automated accessibility checks, across every page on the website. It will highlight accessibility violations and identify opportunities to make your web pages more inclusive and user-friendly.
Some users are tempted to tick every box they can, figuring they can just ignore any data they don't want or need. This is not a great idea, in general.
Every checkbox you tick will require Sitebulb to do more processing, which means the audit will take more time and will use more computer resources. On some computers, ticking every single box will mean that it is very difficult to continue doing other tasks.
In particular, Performance and Accessibility are CPU intensive, so only select them if you actually care about the data.